Mein 1. selbstgemachtes Sushi / My first homemade Sushi
Ich weiß gar nicht, wann ich das letzte Mal Sushi gegessen hatte. Ich denke es war vor der Geburt unseres Sohnes, also vor über 8 Jahren.
Wenn man ein Kind hat, kommt man nicht so oft in Restaurants oder Gelegenheiten, in denen es Sushi gibt ;)
Tiefkühl Sushi aus dem Supermarkt kommt für mich nicht in Frage. Manche Supermärkte bieten mittlerweile auch Sushi Theken an, in denen es tagesfrisch zubereitet wird, aber da wollte ich es mir dann nicht gönnen, da schon wieder genug andere Dinge ihren Weg in meinen Einkaufswagen gefunden hatten ;)
Also half nur eines, um meinen Appetit nach Sushi zu stillen: einfach mal selber machen. Leichter gesagt als getan...
ich liebe es zu Kochen und ich liebe es auch, immer wieder Neues auszuprobieren. Sushi war jedoch völliges Neuland für mich, obwohl ich ansonsten sehr gerne asiatisch Gerichte zubereite.
Aber da ich leicht perfektionistisch angehaucht bin, machte ich mir im Vorfeld schon wieder etliche Gedanken, wie ich wohl die perfekt symmetrisch aussehende Sushi Rolle hinbekomme, so, wie man sie immer auf den edlen Hochglanzbildern sieht. Dieses hat mich oft davon abgehalten, es einfach mal auszuprobieren.
Doch nun habe ich meinen inneren Schweinehund überwunden und meine 1. Erfahrungen im Sushi zubereiten festgehalten, die ich nun mit Euch teile. Und ich möchte Euch auf jeden Fall zum Nachmachen animieren, denn der Geschmack war wirklich excellent und das wird es jetzt bestimmt öfters bei uns geben.
Und wie es mit allen Dingen im Leben ist...Übung macht den Meister ;)
I don't even know when I had eaten sushi for the last time. I think it was before our son was born, so almost 8 years ago. When you have a child, you don't get to go to restaurants that serve sushi that often. Frozen sushi or sushi from the supermarket is out of the question for me. Some supermarkets now offer sushi counters where it is prepared fresh on the day, but then it was usually too expensive for me.
So only one thing helped to satisfy my cravings for sushi: simply make it myself.
I love cooking and I love to try new things. Sushi, however, was completely new territory for me, although I otherwise love to cook Asian food.
But since I'm a bit of a perfectionist, I started thinking about how I could make the perfect, symmetrical-looking sushi roll that you always see in those great glossy pictures.
But I realized pretty quickly that it is not so easy to combine the components as I imagined.
I have recorded my 1st experience in making sushi and will now share it with you. And I would like to animate you in any case to copy, because the taste was really great and there will be now certainly more often with us.
And as it is with all things in life...practice makes perfect ;)

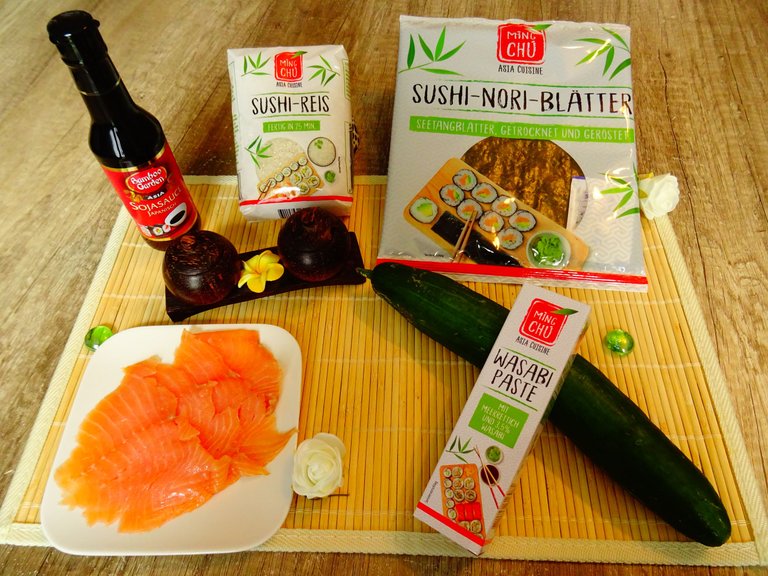
ZUTATEN: / INGREDIENTS:
Ich habe mich für mein 1. DIY Sushi für Lachs Maki entschieden und diese mit Räucherlachs gemacht, da ich kein Lachsfilet in Sushi Qualität bekommen habe. Zusätzlich benötigt man noch Reisessig oder Sushi-Essig, den ich auf dem Foto leider vergessen habe.
I chose Salmon Maki for my 1st DIY sushi, and made it with smoked salmon, because I did not get a salmon fillet in sushi quality. In addition, you still need rice vinegar or sushi vinegar, which I have unfortunately forgotten in the photo.

Ich habe für mein Sushi ca. 2,5 Tassen Sushi Reis genommen. Daraus konnte ich 4 Rollen machen.
Zunächst wird der Reis gründlich gewaschen, um ihn von der Stärke zu befreien und um ihn zu reinigen.
I took about 2.5 cups of sushi rice for my sushi. From this I was able to make 4 rolls.
First, the rice is thoroughly washed to free it from starch and to clean it.
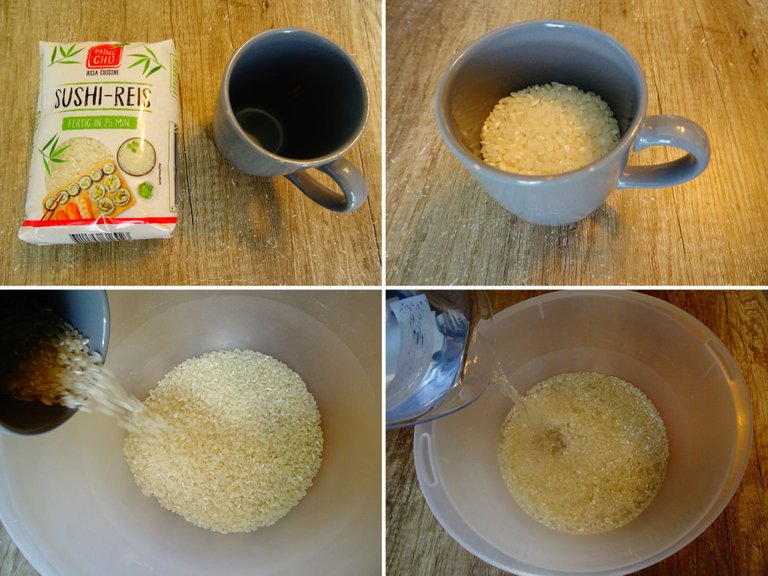
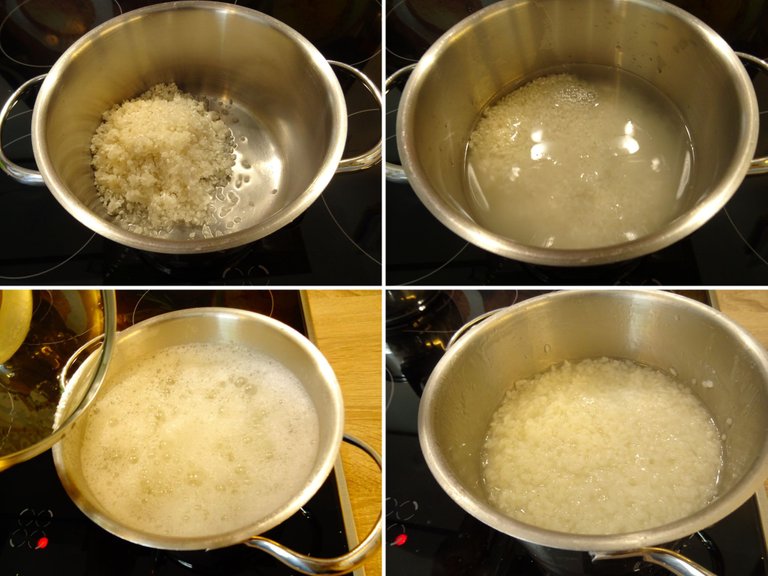
Nachdem ich den Reis 2 mal mit Wasser gewaschen habe, habe ich ihn mit ca. 4 Tassen Wasser zum Kochen aufgesetzt (1,5 Tassen Wasser pro 1 Tasse Reis).
After washing the rice 2 times with water, I put it on to boil with about 4 cups of water (1.5 cups of water per 1 cup of rice).
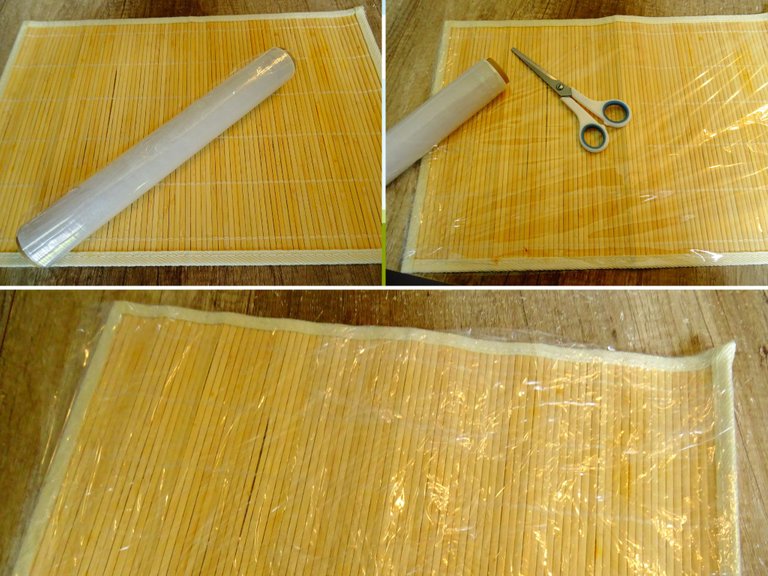
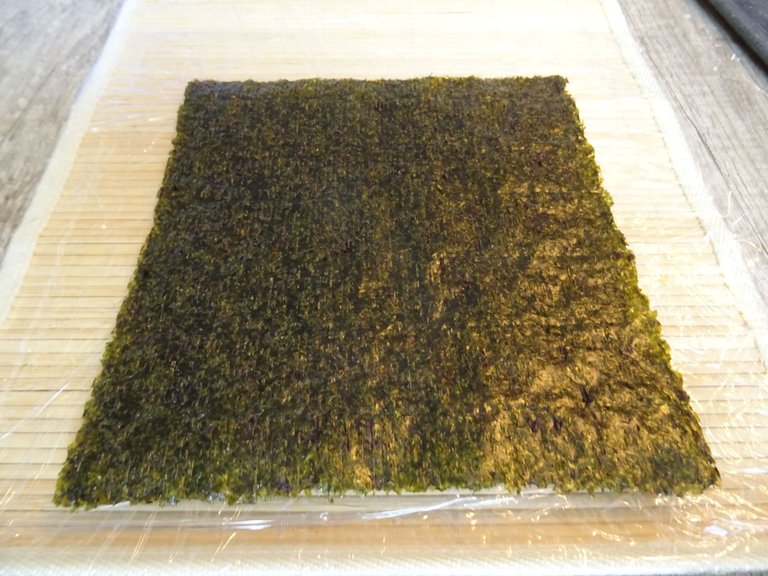
In der Zwischenzeit habe ich die Bambusmatte zum Rollen vorbereitet. Hierzu habe ich sie mit Klarsichtfolie eingeschlagen. Dadurch bleibt die Matte sauber und es klebt nichts fest.
Meine Bambusmatte fühlte sich beim Rollen etwas zu groß und unhandlich an. Es gibt spezielle Bambusmatten für die Zubereitung von Sushi zu kaufen, die etwas kleiner sind. Ich denke die Investition lohnt sich und für das nächste Mal werde ich mir eine besorgen.
In the meantime, I prepared the bamboo mat for rolling. To do this, I wrapped them with cling film. This keeps the mat clean and nothing sticks.
My bamboo mat was a little too big when rolling. There are special bamboo mats for preparing sushi that are a little smaller. I think the investment is worth it and for the next time I will get me one.
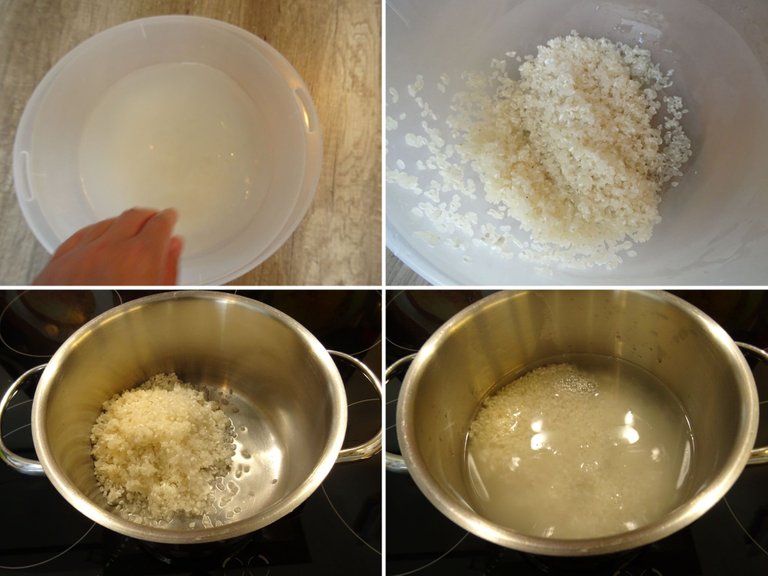
Sobald das Reiswasser kocht, stellt man die Hitze herunter und lässt den Reis mit Deckel ca. 20 min. (je nach Packungsangabe) leicht köcheln. Der Reis ist fertig, wenn er das ganze Wasser aufgenommen hat. Zwischendurch muss man natürlich immer wieder umrühren, damit der Reis nicht ansetzt.
Nach der Kochzeit nimmt man den Reis von der Platte und lässt ihn noch einmal 10 min. im Topf quellen.
Once the rice water boils, turn down the heat and let the rice simmer gently with the lid on for about 20 min (depending on package instructions). The rice is ready when it has absorbed all the water. In between, of course, you have to stir again and again so that the rice does not boil solid.
After the cooking time, remove the rice from the plate and let it rest in the pot for another 10 minutes.
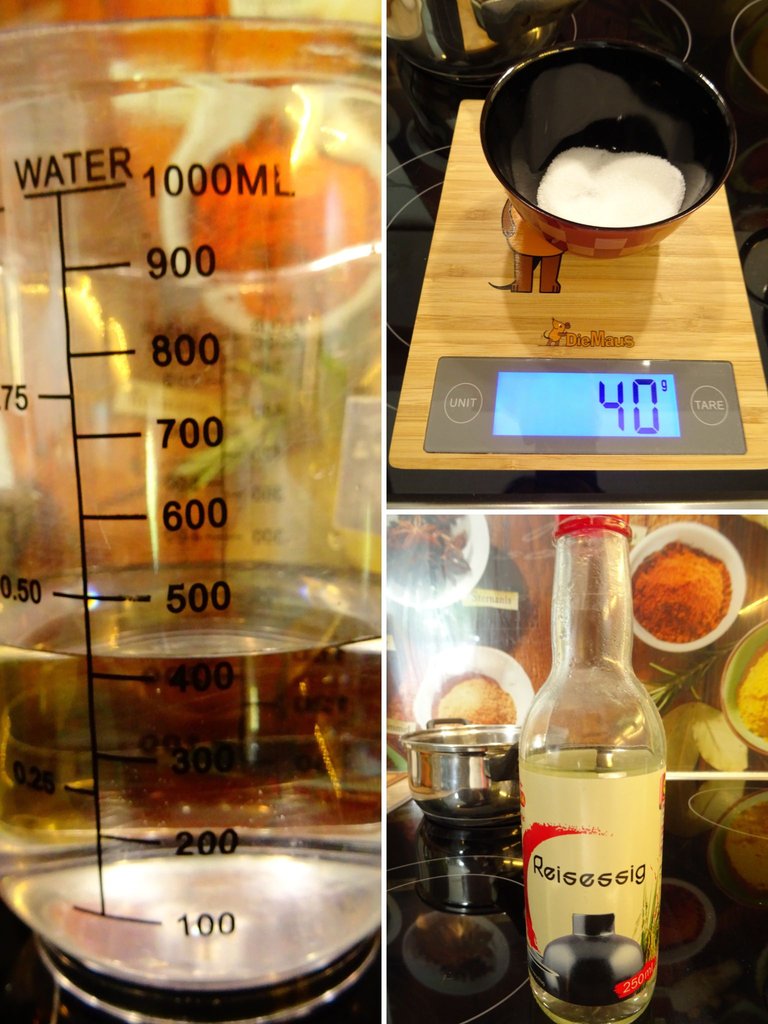
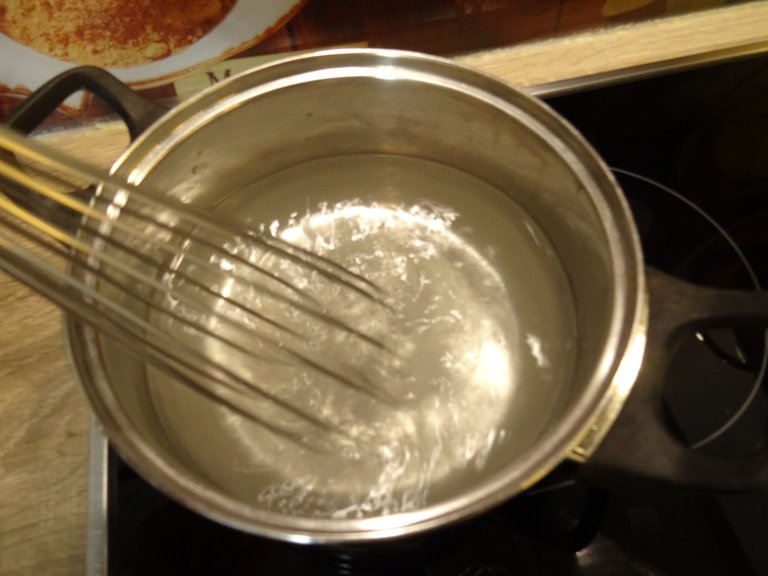
Wenn man keinen fertigen Sushi Essig vorrätig hat, kann man diesen ganz leicht selber ansetzen. Hierzu habe ich ca. 450 ml Wasser mit 40g Zucker
und 40 ml. Reisessig erwärmt, bis sich der Zucker gelöst hat. Danach lässt man das Gemisch abkühlen.
If you do not have ready-made sushi vinegar in stock, you have to prepare it yourself. For this I have about 450 ml of water with 40g sugar
and 40 ml. Rice vinegar heated until the sugar has dissolved. Then let the mixture cool down.
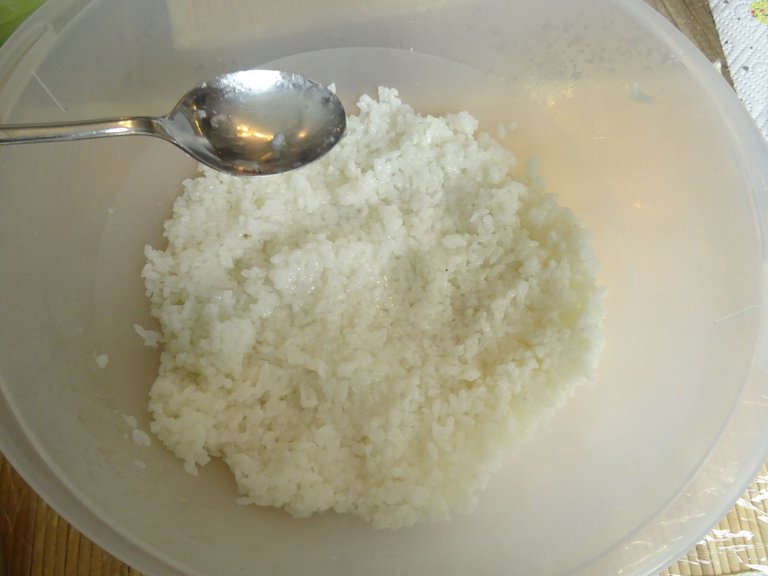
Nachdem der Reis nochmal 10 min. gezogen ist, füllt man ihn in eine große Schüssel zum Auskühlen um. Dafür gibt es auch spezielle Holzschalen, die die restliche Feuchtigkeit des Reis aufsaugen. Ich habe eine einfache Plastikschüssel verwendet und ein Tuch darüber gelegt, damit der Reis nicht austrocknet.
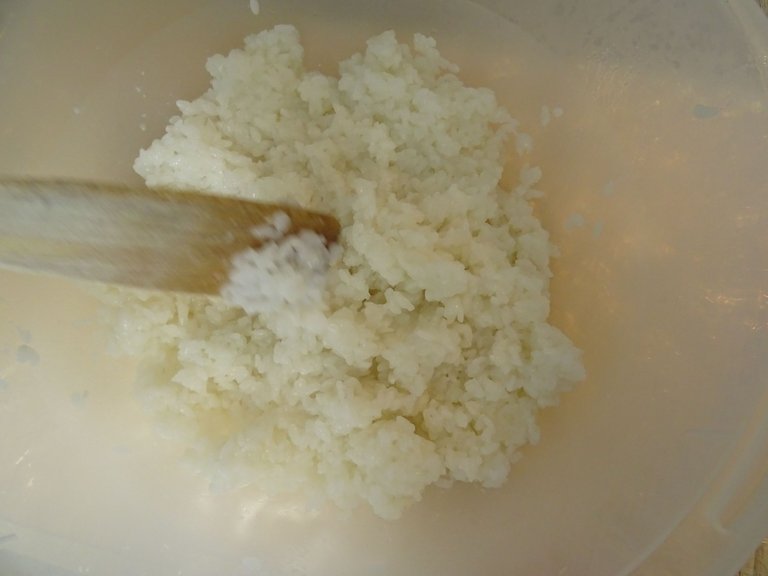
Wenn der Reis Zimmertemperatur angenommen hat, würzt man ihn mit dem Essig-Gemisch und lockert ihn dabei etwas auf.
After the rice has steeped for another 10 minutes, transfer it to a large bowl to cool. For this there are also special wooden bowls that absorb the remaining moisture of the rice. I used a simple plastic bowl and placed a cloth over it to keep the rice from drying out as well.
When the rice has reached room temperature, season it with the vinegar mixture, loosening it up a bit.
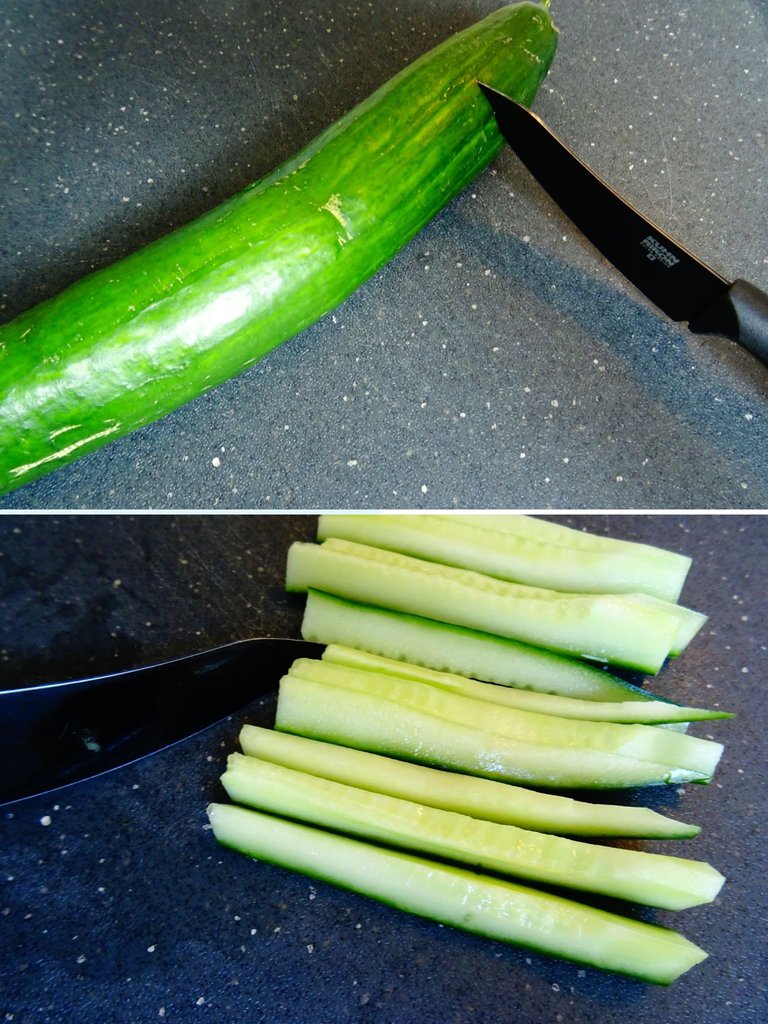
Nachdem ich nun den Reis vorbereitet hatte, konnte ich mit dem Schneiden des Gemüses beginnen. Ich habe mich für eine Gurke entschieden, da sie gut zum Räucherlachs passt. Man kann z.B. auch gut Avocado oder Möhrenstifte verwenden. Da sind der Kreativität keine Grenzen gesetzt. Für meinen 1. Versuch habe ich es lieber einfach gehalten ;)
Now that I had prepared the rice, I could start cutting the vegetables. I chose a cucumber, because it goes well with the smoked salmon. You can also use, for example, good avocado or carrot sticks. There are no limits to creativity.
For my 1st attempt I preferred to keep it simple ;)
Nachdem ich nun alle Vorbereitungen abgeschlossen hatte, konnte ich mit dem Rollen meiner Lachs Maki beginnen. Hierfür habe ich mir alle benötigten Zutaten bereitgestellt.
Den Rest von dem Essig-Gemisch kann man benutzen, um die Finger darin anzufeuchten, damit der Sushi Reis nicht an ihnen kleben bleibt.
Now that I had completed all the preparations, I could start rolling the Salmon Makis. For this I have provided me all the ingredients.
The rest of the vinegar mixture can be used to moisten the fingers so that the sushi rice does not stick on them.
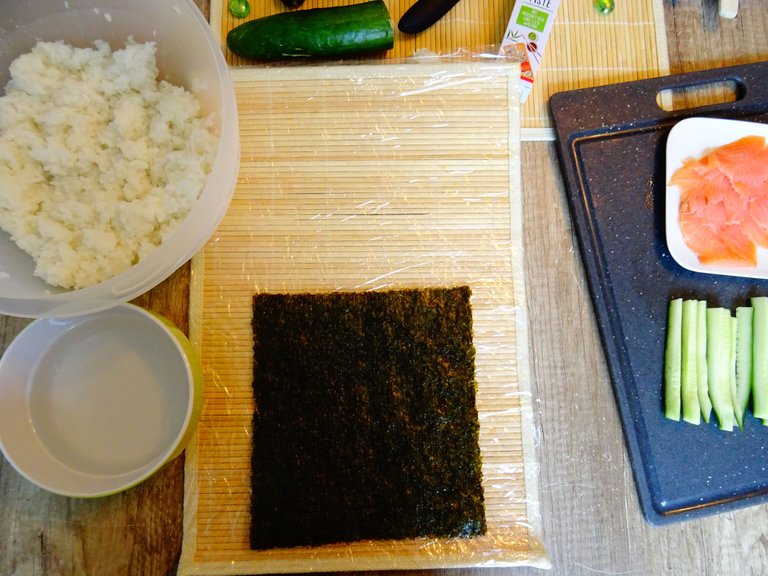
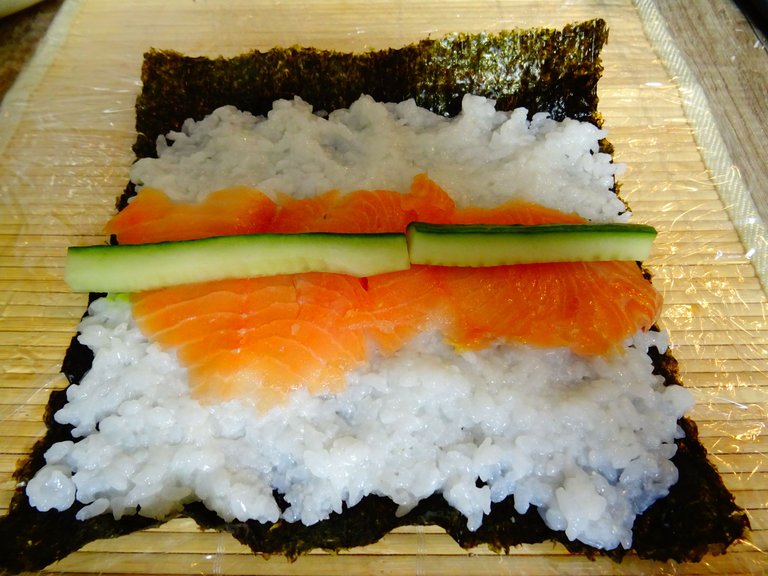
Das Nori Blatt wird mit der glänzenden Seite nach unten auf die Bambusmatte gelegt. Wenn man die Rolle etwas dünner haben möchte, und nur 1 Zutat hat, reicht auch ein halbes Nori Blatt.
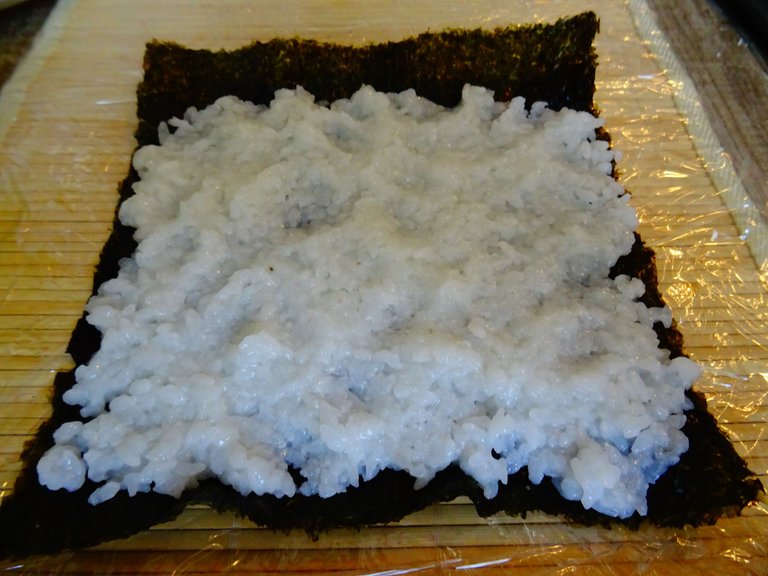
Nun habe ich eine Hand voll Reis genommen und mit den Fingern auf dem Nori Blatt verteilt. Wichtig ist, dass man am oberen Rand ca. 1-2 cm frei lässt, damit die Rolle später gut zusammenhält.
The nori sheet is placed on the bamboo mat with the shiny side down. If you want the roll a little thinner, and have only 1 ingredient, you can also take half a Nori sheet.
Now I took a handful of rice and spread it on the nori sheet with my fingers. It is important that you leave about 1-2 cm free at the top edge, so that the roll later holds together well.
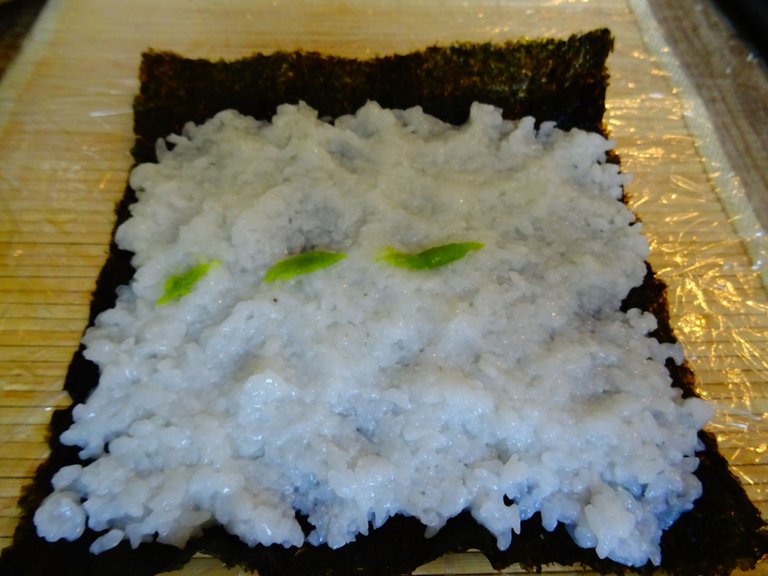
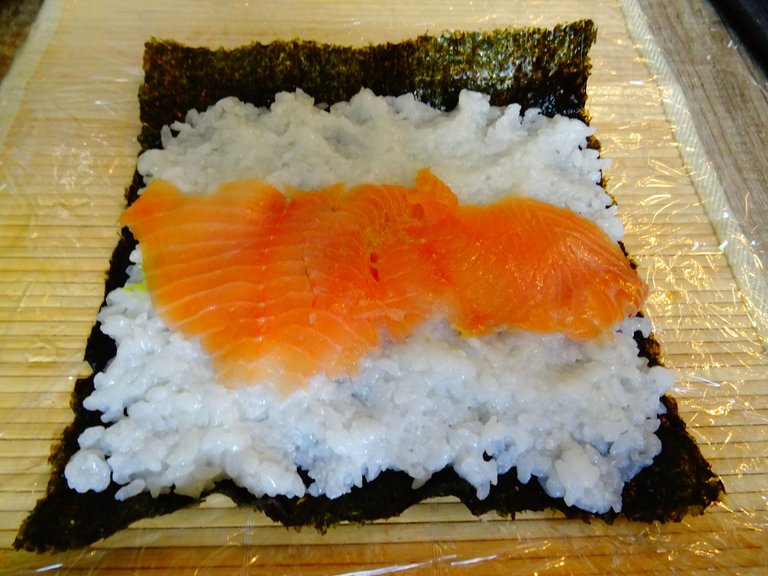
Nachdem ich den Reis gut verteil habe, habe ich etwas Wasabipaste mit dem Finger darauf gestrichen und anschließend den Räucherlachs und dann die Gurkenstifte mittig aufgelegt.
After spreading the rice well, I spread some wasabi paste on it with my finger and then centered the smoked salmon and the cucumber sticks.
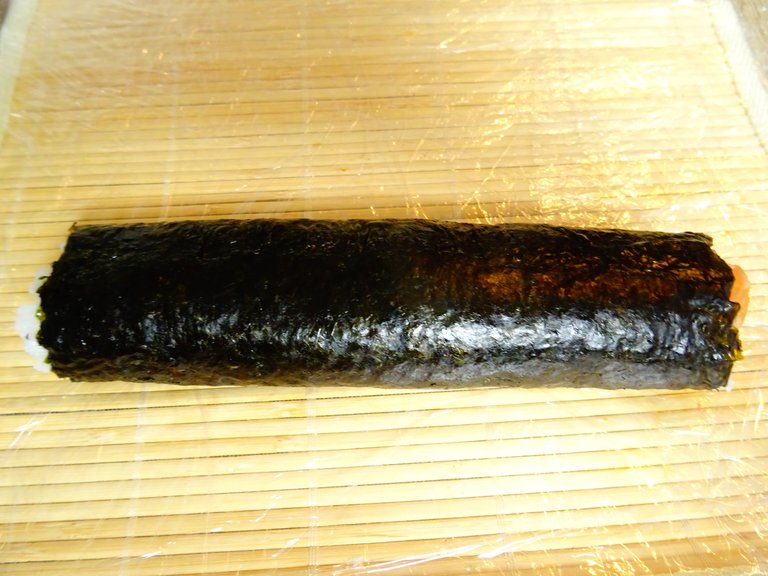
Das Rollen ist nun die eigentliche Kunst. Man muss darauf achten, das man die Rolle immer wieder fest zusammendrückt und dabei die einzelnen Zutaten nicht herausdrückt.
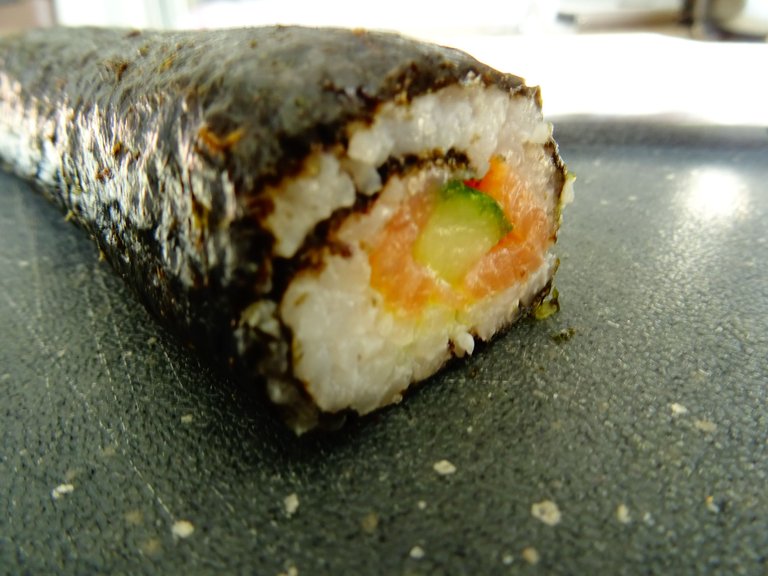
Ich habe aus meinen Zutaten ca. 4 Rollen machen können, und es fiel mir von mal zu mal leichter.
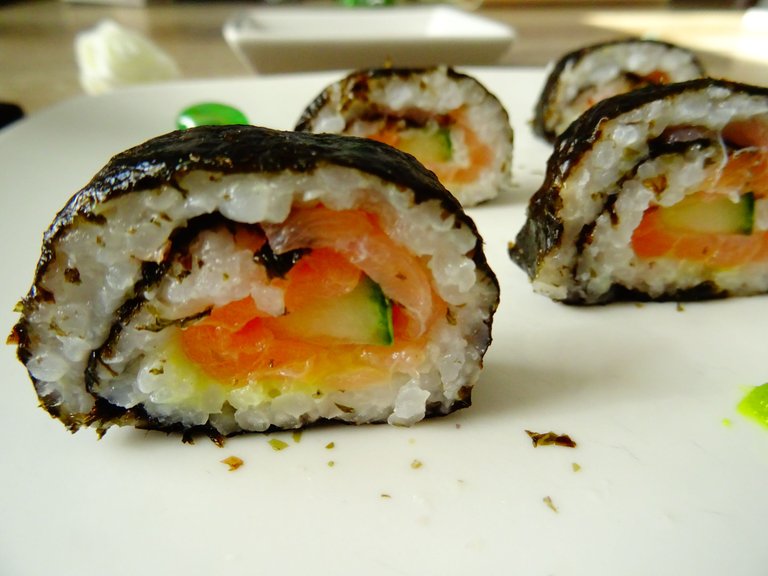
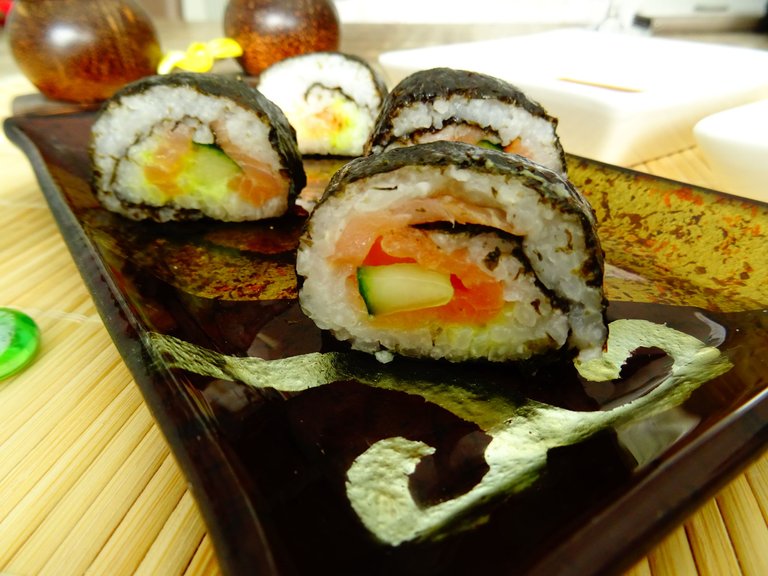
Mein Sushi ist natürlich nicht perfekt geworden, aber für das 1. Mal war ich mit dem Ergebnis sehr zufrieden und der Geschmack konnte absolut überzeugen.
Man kann die Sushi Rollen übrigens auch sehr gut einfrieren. Dazu wickelt man sie am Besten in Frischhaltefolie und legt sie dann in einen Gefrierbehälter. So hat man bei der nächsten Feier direkt eine schöne Vorspeise parat.
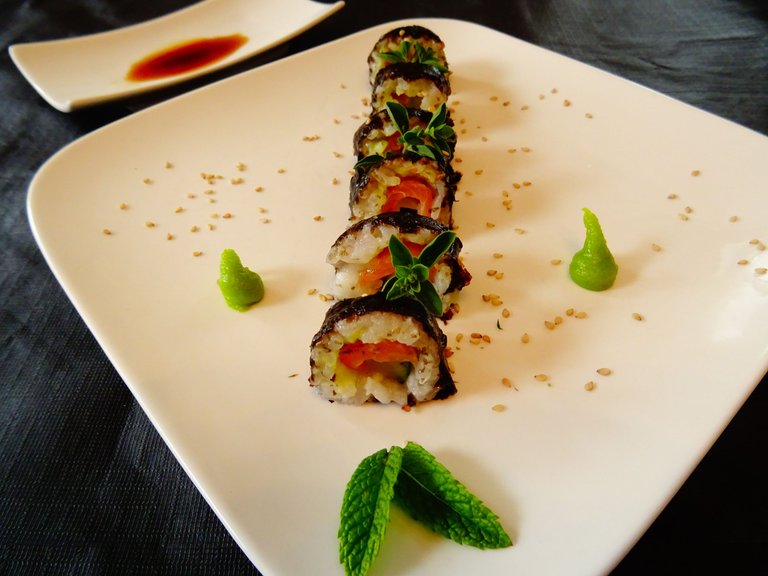
Dazu reicht man eine japanische Sojasauce, etwas Wasabi Paste und eingelegte Ingwerscheiben.
The rolling is now the real art. You have to make sure that you squeeze the roll tightly again and again and do not press out the individual ingredients.
I have been able to make about 4 rolls from my ingredients, and it was easier for me from time to time.
My Sushi looked of course not perfect, but for the 1st time I was very satisfied with the result and the taste could absolutely convince.
You can also freeze the sushi rolls very well. To do this, it is best to wrap them in cling film and then put them in a freezer container. So you have at the next celebration directly a nice appetizer ready.
Serve with Japanese soy sauce, some wasabi paste and pickled ginger slices.


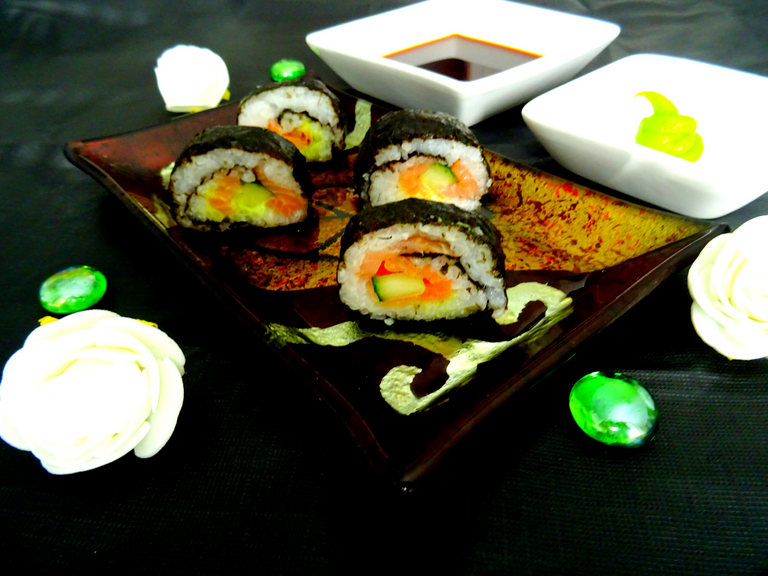
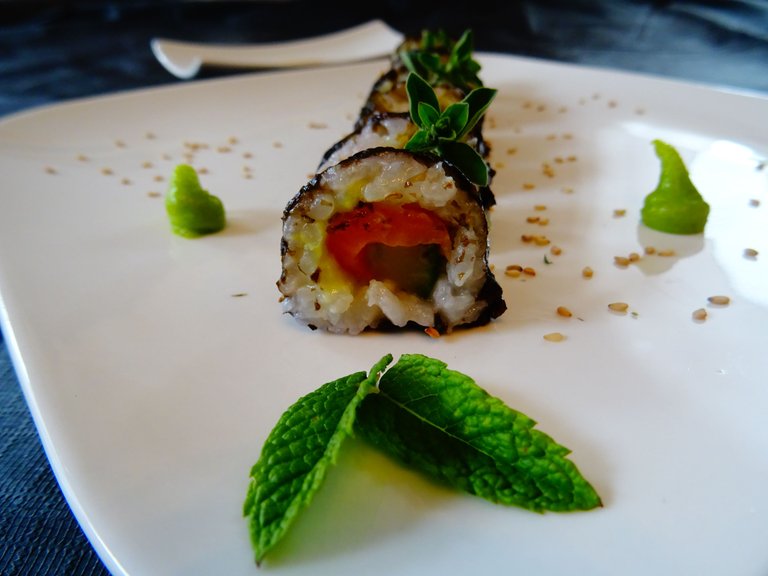
Guten Appetit / Bon Appétit!
Ich hoffe, Euch hat mein Sushi Rezept und meine Zubereitung gefallen. Und wenn Ihr das nächste Mal Appetit auf Sushi bekommt, versucht Ihr es vielleicht auch einmal selber ;)
I hope you liked my sushi recipe and preparation. And the next time you get an appetite for sushi, maybe try it yourself ;)

All photopraphs and content are my property.
The Logos were created with Canva.