⭐Hello Guys⭐
In this post, I'll present a beginner's guide, explaining some basic terms and the first actions you can take. I will write this guide, based on the experiences I have had and lived so far. So come on!

⭐The Beginning⭐
❗ If you don't have an account yet, please login using my link: https://www.risingstargame.com?referrer=shiftrox

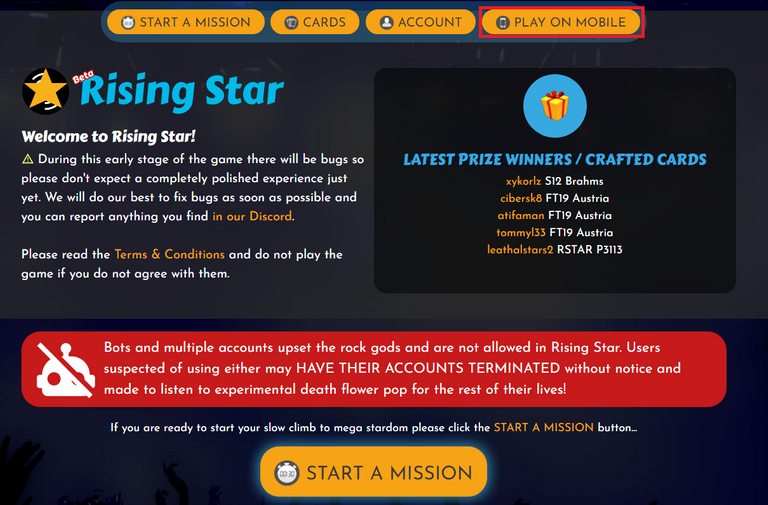
When logging in, you will be presented with this screen:
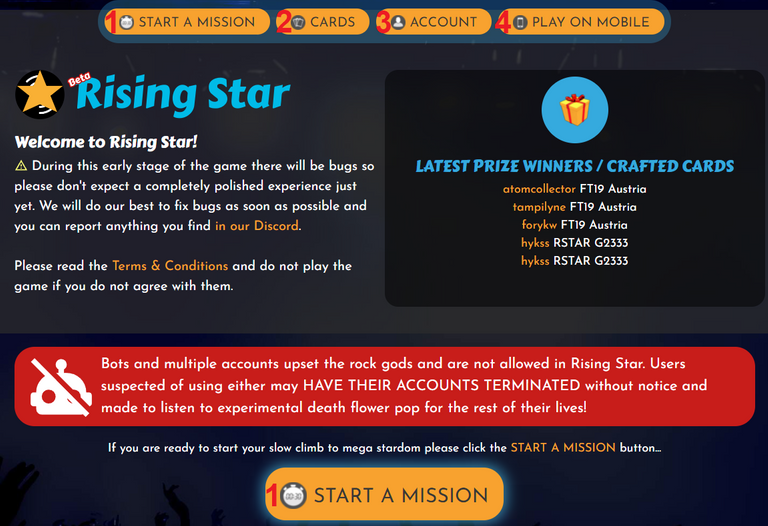
Start a Mission: Clicking takes you straight to the missions screen, which I consider the main game screen.
Cards: Page where you can check your cards.
Account: Here you go to your account screen, where you have some settings.
Play on Mobile: You go to a page where you can create a link to play on your mobile (we'll talk about that later).
⭐The Terms And Nomenclatures⭐


Missions: These are the missions you will perform to gain XP and starbits. I usually divide (so far) into 2 types: starbit and skill missions. A mission needs X fans, X level, X duration and X energy to be done. At the end of each mission, the XP and starbits gained are guaranteed, but you can find: temporary fans, piece of pizza, coffee cup and four leaf clover.

Boosters: As stated above, you can find 4 different boosters when you finish a mission which are: temporary fans, a piece of pizza that restores your full energy, coffee cup that increases your energy regeneration and four leaf clover that increases your luck (temporary).

Cards: Are important for growth in the game. Usually each card has 4 stats: fans, luck, skill and IM, but there are also several other cards with different roles and objectives, which have no status but have a specific role in the game. I won't talk about them completely here, I'll leave it for a next guide. They have rarities/types that are: common, rare, epic, legendary, seasonal, limited edition, special, boost, runner, fuel, location, storage, crafted, records and festival.
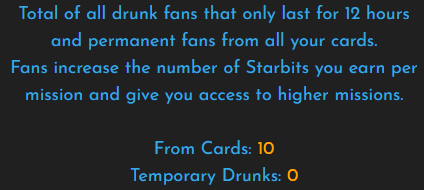
Explaining in detail: imagine you have 10 fans and a mission has a return of 1~50 Starbits. If you get 50 more fans it will total 60, your mission will return 1~100 starbits. So, let's say each fan increases their maximum starbits by 1.
❗Reinforcing this calculation is hypothetical, I never stopped to calculate if 1 fan = 1 Max starbits. Maybe the count is 10 fans = 1 Max starbits per mission for example.
Fans can be fixed, meaning they come from cards you own, or they can be temporary. With every mission you complete, there's an opportunity for some temporary fans (and drunks) to add to your total. Counting to max starbits or releasing a mission that needs X fans works normally.
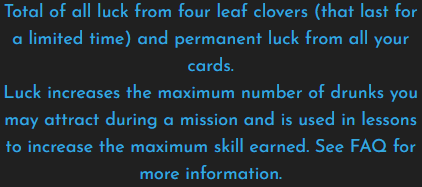
Luck: Composed of the luck total of your cards and the four leaf clover found. Its use as described in the game is to increase the chance of a larger amount of temporary fans appearing after a mission done. It also increases the possibility of receiving a higher skill score after a mission of this type is done. Basically, the more the better!
Skill: Explaining about the skill can be a little tricky, as this score serves to balance the EGO. When you enter the game, there is no visible EGO yet, but basically it works like this: when you reach level 15 or reach 1k (one thousand fans), the EGO appears to you. If your EGO is higher than your skill, your maximum amount of starbits decreases per mission.
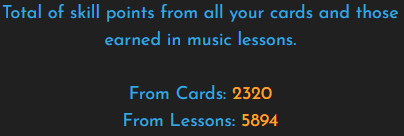
Skill points come from the cards you have and skill missions, they are different that don't return starbits but skill points. These skill points are cumulative and do not decrease, only the skill points of cards can be subtracted, if you sell a card, for example.

IM (Income Modifier): Well, I don't think anyone knows exactly what this is for. As the explanation says, it's for future use, perhaps to determine how many cards you have and that this modifies your profile.

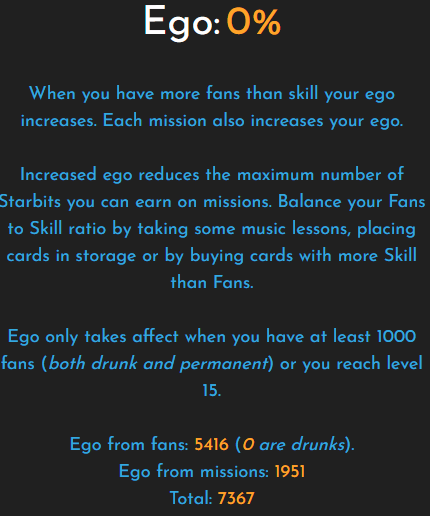
EGO: And here it is: the EGO! Okay, how does this work? Every fan you have, increments 1 EGO for the account, and every mission you do, also increases the count. So in our example on the side, I have 5416 fans which generates 5416 EGO fans, the temporary fans also come into the account, while they are with you. The EGO of missions is cumulative and there is no way to lower it, that is, it is always being added. In the end, your EGO is the sum of these 2 items.
In that example of our fans, let's redo it applying EGO, so we have 60 fans, and our mission returns 1~100 starbits, if my EGO is above 0%, our maximum starbits will be reduced, for example, 1~98.
❗Again, this account is hypothetical, I have never stopped to calculate exactly what is subtracted. I “think” that if the ego is at 1% it is subtracted 1% from the maximum, if it is 10% it is decreasing by 10%. I don't think it's necessary to know exactly what is reduced, just that “the skill has to be above the EGO”.
⭐The Basics⭐
In my example I will use an account created a few days ago to make assimilation easier. I created this account just to be able to simulate a beginning and make it easier to show the beginning of a career.
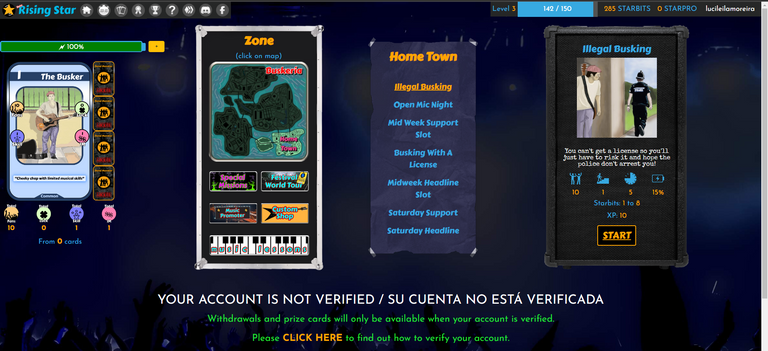
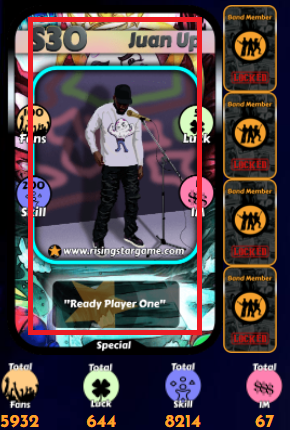
On the left, we have a summary of our career:
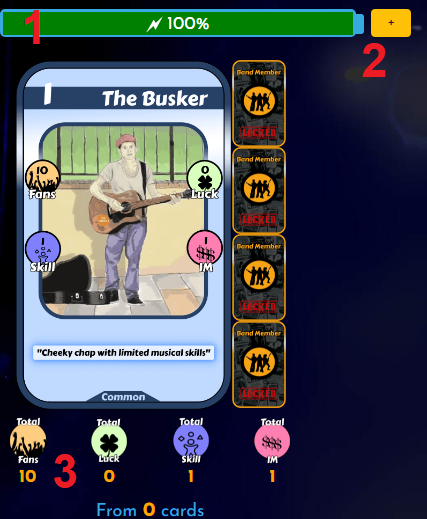
Energy Bar: As the name says, this green bar is your energy, it is used to do missions. Each mission has an X energy expenditure number and the count is quite simple: If a mission consumes 65% energy, after starting it, you will have 35% (100 - 65 = 35). After starting the mission, your energy will slowly charge over time.
Button “+”: Clicking this button opens a small form showing some boosters. In summary, boosters are items that you use to recharge your energy without having to wait for it to charge over time. I won't go into the subject too much, as I find this part more interesting when you've been playing for some time.
Status: Here we have the total of Fans, Luck, Skill, IM and Total Cards.
EGO: I didn't put the number 4 in the print, but when you enable EGO (level 15 or 1k fans) it will be next to the energy bar. The full explanation of EGO is in The Terms And Nomenclatures section.
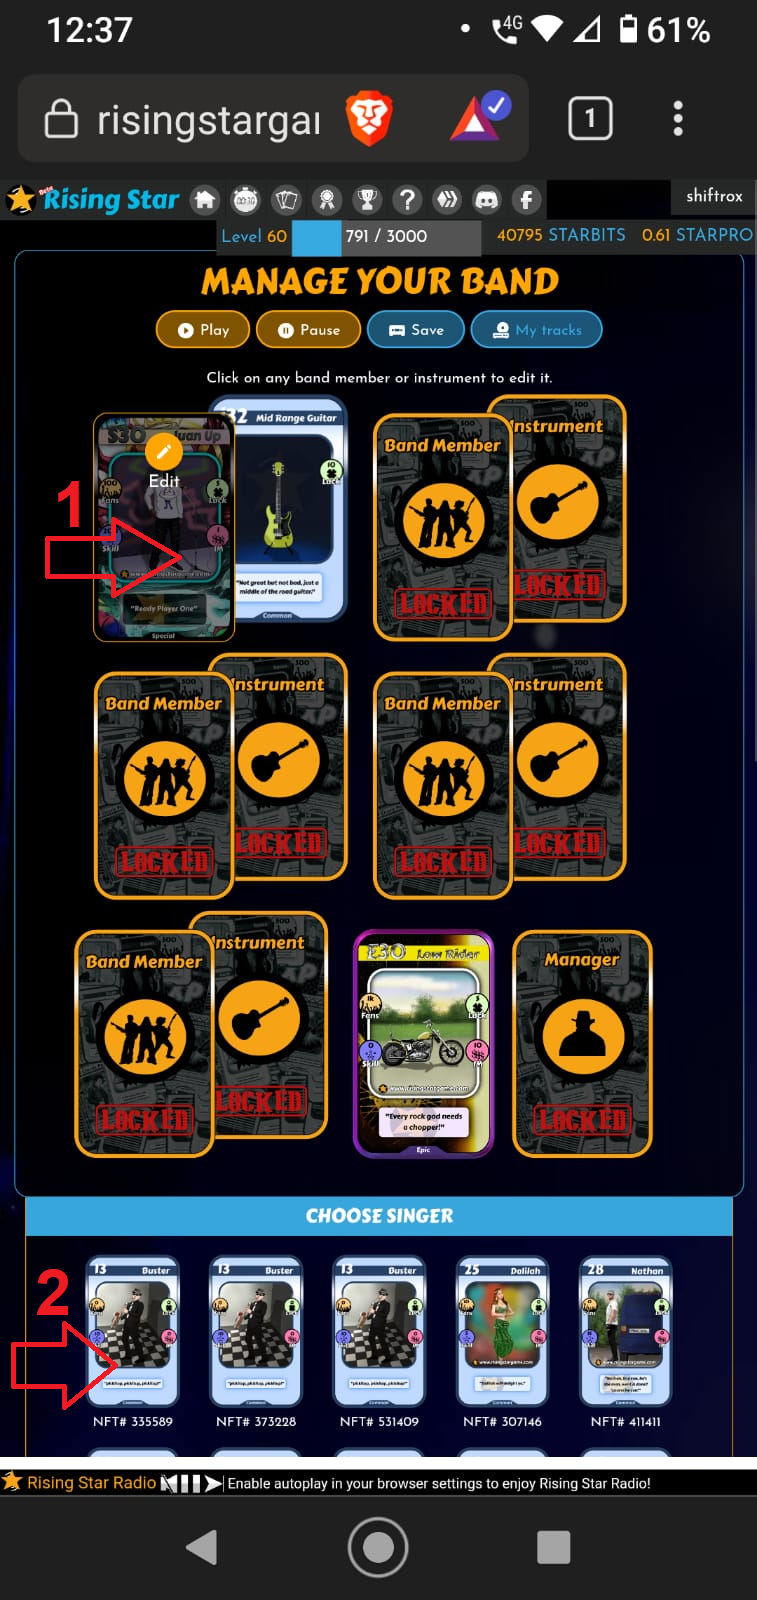
In the middle of the screen, we have the zone and mission part.
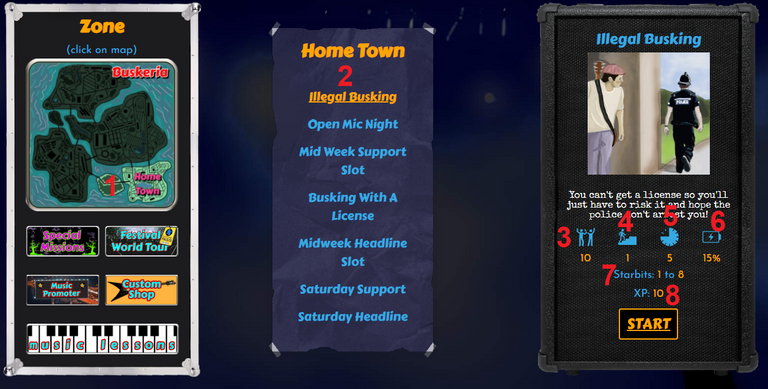
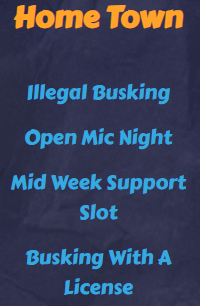
Zone: The missions area is where the missions you can do are grouped. At first we have only released the “Home Town” and as soon as you can progress in your career, new zones are released. For now, I'm on the second “Local Gig Circuit”. It's a long walk, friends.
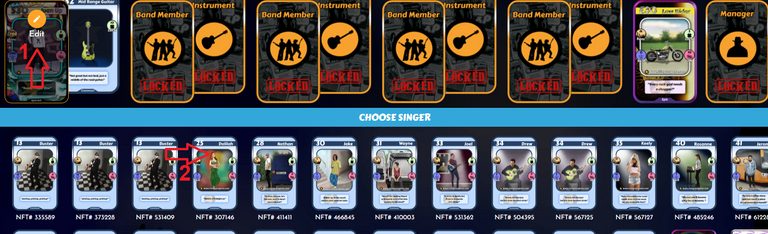
Mission List: This is the list of missions available for the selected zone. To change mission you just click on her name and the information will appear in the image on the right.
Fans Needed: How many fans are needed to make the mission. Remembering that temporary fans help in the sum to enable the mission.
Level Needed: Level required to do the mission. You will need to repeat some missions to accumulate XP and level up.
Duration: Duration of the mission. It's always shown in minutes, so 2 hours of mission is 120 minutes, 3 hours is 180 for example.
Energy Needed: The amount of energy you need to do the mission.
Starbits: The minimum and maximum amount of starbits the mission returns to you. The more fans you have, the greater your maximum. The minimum counter is not changed.
XP: The amount of experience you gain by completing the quest. Starbit and XP values are credited at the end of the mission and not at the beginning.
In the upper right corner, we have:

Level / Experience: This part shows your level and the experience you have.
Starbits / Starpro: The total starbits and starpro you have. I will make another guide to explain better how to get starpro.
Nickname: your nick is here, when hovering over it, some more options appear, but nothing very interesting for this first moment.
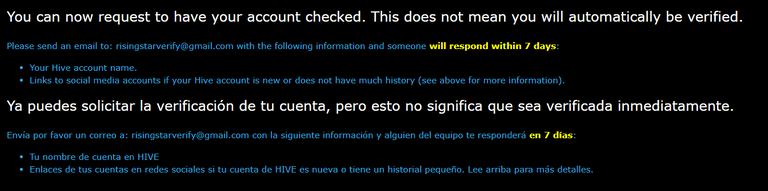
⭐Verifying Your Account⭐
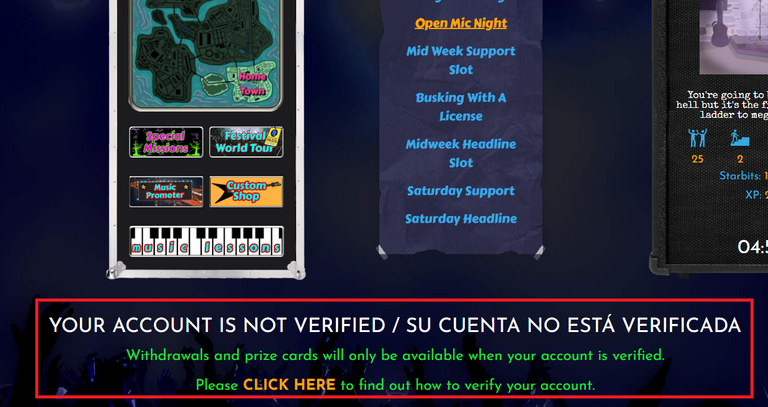
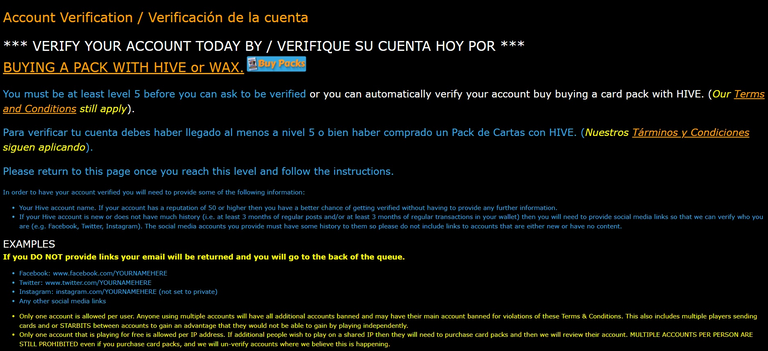

Now, if your account is new or doesn't have much movement, that is, few posts or transactions in the wallet, you will need to provide a link to your social network, which could be Facebook or Twitter, for example.

From level 5 onwards, when going to the same page by clicking on the indicated link, a new information appears at the bottom. You will need to send an email with the name of your hive account. If you are very active, the indication itself already shows that you do not need to send social media links. I recommend that you send everything at once, I think that too much information is never too much.
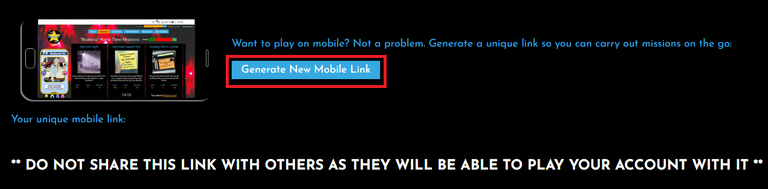
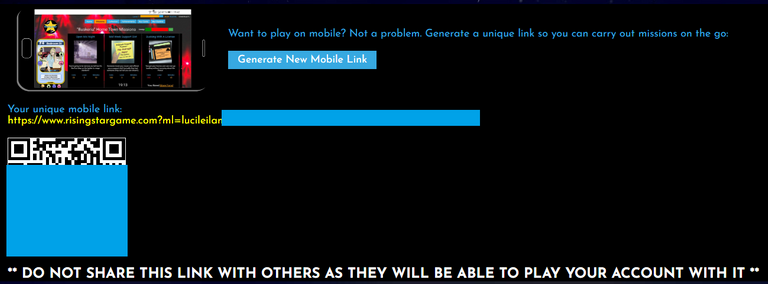
⭐Play On Mobile⭐
To get to the page where you generate the link, you can access the home page below:
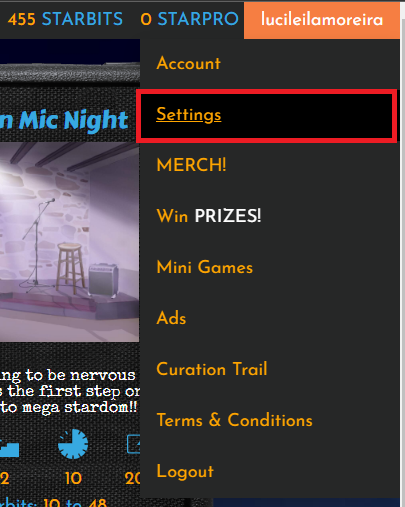
Or you can go that way by clicking your nick in the upper right corner. When opening the options, click on Settings. These two ways take you to the same place, a page where you will generate your link to use on your cell phone.
❗Be careful with this generated link! No sign-in validation will be done, so anyone can sign in and do something wrong with your account! Clicked, entered and played!
⭐Conclusion⭐
As this was the first one I've written, I've never done such a large publication, it may be that I've forgotten something or some statement is wrong, so I kindly ask that any errors or discrepancies found, please feel free to write to us comments.
So that's it, the basics of Rising Star is this. The first goals you will do are:
- Perform missions to gain starbits and XP to level up. ✔️
- Get to level 5 and verify your account. ✔️
- Perform and repeat missions until you get 10k starbits and start buying packs. With patience, the game becomes sustainable! 🔁✔️
- Participating in giveaways that the community does, as it helps a lot. ✔️
- And the main thing! Make lots and lots of friends! 👊✔️
I know something is missing and you ask me "how do I buy pack of cards?" Well, in order not to make the guide bigger than it already is, I prefer to leave it for the next part, so I focus 100% on explaining and showing what to do. There's too much information to put everything in just 1 guide or post, so I'll make more guides over time to help the community.
Plus, there's no need to rush, because in the beginning, even collecting 10k Starbits takes considerable time, so take it easy, enjoy the walk and soon we'll be at the top of the music charts!

I'll leave links here to the guides I'm making, I hope it helps:
Basic Guide To Intro Rising Star - Part 2

If you want to learn more about HIVE games, you can start playing:
👨🌾DCROPS👨🌾
⭐RISING STAR⭐
🐲SPLINTERLANDS🐲
Footer Designed With Canva